Welcome to the world of Java development! Before you can start writing amazing Java programs, you need to set up your development environment. This involves installing two key components:
- Java Development Kit (JDK): This contains the tools needed to compile and run Java code.
- IntelliJ IDEA: This is a powerful and user-friendly Integrated Development Environment (IDE) where you’ll write, run, and debug your Java code.
Let’s get started!
Step 1: Install the Java Development Kit (JDK)
The JDK is essential for Java development. It provides the compiler, runtime environment, and other necessary tools.
- Go to the Oracle Website (or an OpenJDK Distribution):
- Oracle JDK (Generally requires an account and might have licensing implications for commercial use): Open your web browser and go to the official Oracle Java downloads page. Search for “Java SE Development Kit” or navigate to the downloads section on Oracle’s website.
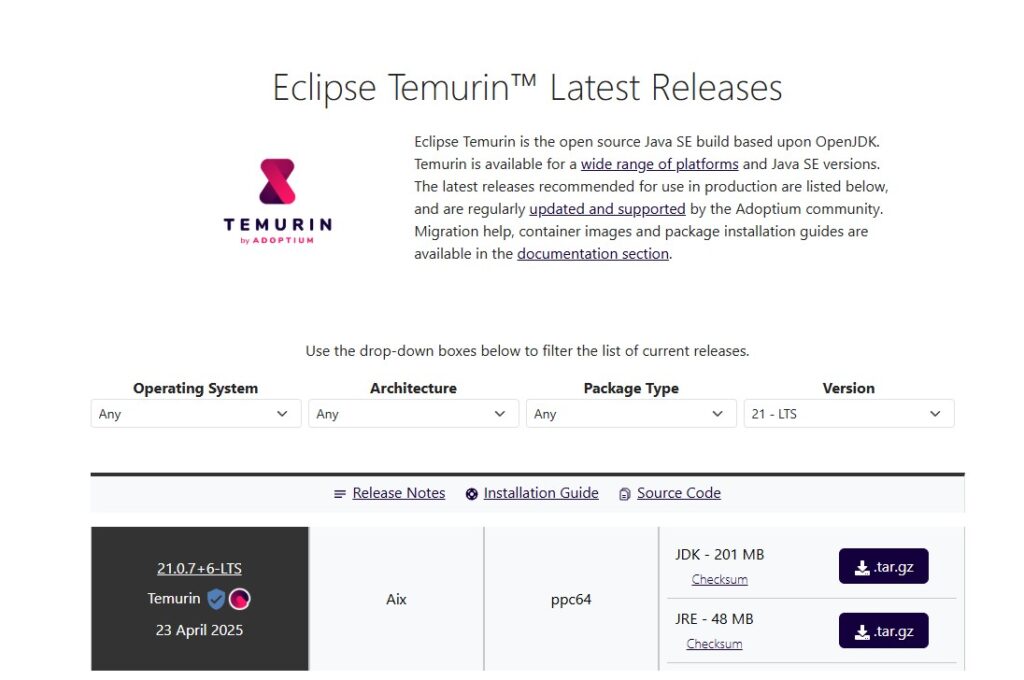
- OpenJDK (A free and open-source alternative, often recommended for beginners): You can download OpenJDK from various providers. A popular option is Adoptium (now Eclipse Temurin). Go to https://adoptium.net/releases.html.
For this guide, we’ll use the OpenJDK (Eclipse Temurin) as it’s generally easier for beginners to get started with.
- Download the Correct JDK Version:
- On the Adoptium website, you’ll see different versions of Java available. For beginners, it’s usually best to go with the latest Long-Term Support (LTS) version. Look for a version like “Java 17 (LTS)” or “Java 21 (LTS)”.
- Select the appropriate operating system for your computer (Windows, macOS, or Linux).
- Choose the correct architecture (usually “x64” for modern computers).
- Click on the download link for the installer (usually a .exe file for Windows, a .dmg file for macOS, or a .tar.gz or .deb/.rpm file for Linux).

- Run the JDK Installer:
- Once the download is complete, locate the installer file on your computer and double-click it to run.
- Follow the on-screen instructions. The installation process is usually straightforward. You might be asked to confirm the installation location. It’s generally fine to leave it at the default location.
- Verify the JDK Installation:
- Windows:
- Open the Command Prompt. You can search for “cmd” in the Start Menu.
- Type the following command and press Enter:
java -version - If the JDK is installed correctly, you should see information about the Java version.
- Windows:

-
- macOS:
- Open the Terminal. You can find it in Applications > Utilities.
- Type the same command as above and press Enter:
java -version - You should see the Java version information.
- macOS:
-
- Linux:
- Open a terminal window.
- Type the same command:
java -version - Verify the output shows the correct Java version.
- Linux:
Step 2: Download and Install IntelliJ IDEA
IntelliJ IDEA is a popular IDE known for its features that help developers write code more efficiently. We’ll be using the free Community Edition.
- Go to the JetBrains Website:
- Open your web browser and go to https://www.jetbrains.com/idea/download/.
- Download IntelliJ IDEA Community Edition:
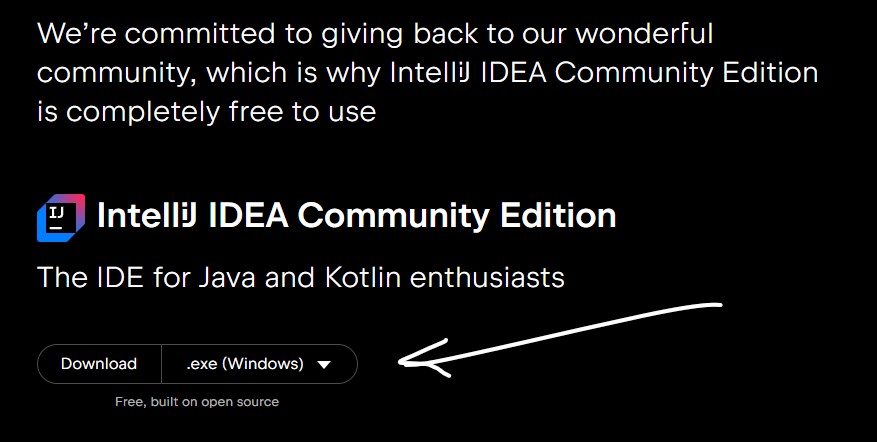
- You’ll see options for both “IntelliJ IDEA Ultimate” (paid) and “IntelliJ IDEA Community Edition” (free).
- Make sure you select the Community Edition.
- Choose the appropriate operating system (Windows, macOS, or Linux).
- Click the “Download” button.

- Run the IntelliJ IDEA Installer:
- Once the download is complete, locate the installer file on your computer and double-click it to run.
- Follow the on-screen instructions. The installation process is usually straightforward.
- Complete the Installation:
- The installer might ask you about some optional features. For beginners, the default settings are usually fine. You might want to consider checking the box to “Create Desktop Shortcut” for easy access.
- Once the installation is finished, you might be prompted to restart your computer. It’s generally a good idea to do so.
Step 3: Configure IntelliJ IDEA to Use the JDK
Now, you need to tell IntelliJ IDEA where to find the JDK you installed.
- Launch IntelliJ IDEA:
- After the installation, find IntelliJ IDEA in your applications or use the desktop shortcut if you created one and launch it.
- Initial Setup (If it’s your first time):
- You might be greeted with an initial setup wizard. Follow the prompts. You can usually accept the default settings.
- Locate the JDK Settings:
- Once IntelliJ IDEA is open, you’ll likely see a “Welcome to IntelliJ IDEA” screen.
- Click on “New Project”.
- Configure the Project SDK (JDK):
- In the “New Project” window, you’ll see a section for “Project SDK”.
- If the JDK you installed was automatically detected, it will be listed here. You can verify it’s the correct version.
-
- If no SDK is listed or if it’s incorrect, click on the “Add SDK…” button (it might look like a “+” icon or a dropdown menu).
- Select “JDK…”.
- Browse to Your JDK Installation Directory:
- A file browser window will open. You need to navigate to the directory where you installed the JDK.
- Windows (Typical Location): C:\Program Files\Java\jdk-your-version (replace jdk-your-version with the actual version number).
- macOS (Typical Location): /Library/Java/JavaVirtualMachines/jdk-your-version.jdk/Contents/Home (replace jdk-your-version with the actual version number).
- Linux (Location varies depending on the distribution): Common locations include /usr/lib/jvm/ or /opt/java/.
- Select the JDK Directory:
- Once you find the JDK directory, select it and click “OK” or “Open”.
- The selected JDK should now be listed under “Project SDK”.
Step 4: Create Your First Java Project in IntelliJ IDEA
Now that your JDK is configured, let’s create a simple Java project.
- In the “New Project” Window:
- Make sure “Java” is selected on the left-hand side.
- Give your project a name in the “Name” field (e.g., “HelloWorld”).
- Choose a location on your computer where you want to save the project files in the “Location” field.
- Click “Create”:
- IntelliJ IDEA will create the basic structure for your Java project.
- Create a New Java Class:
- In the “Project” window on the left side of the IntelliJ IDEA interface, you’ll see your project folder.
- Right-click on the src folder (which stands for “source”).
- Select “New” -> “Java Class”.
- Name Your Class:
- A dialog box will appear asking for the class name. Type HelloWorld (it’s a convention to start class names with a capital letter).
- Press Enter or click “OK”.
- Write Your First Java Code:
- A new file named HelloWorld.java will open in the editor. Type the following code into it:
1public class HelloWorld {<br> public static void main(String[] args) {<br> System.out.println("Hello, World!");<br> }<br>}
- A new file named HelloWorld.java will open in the editor. Type the following code into it:
-
- Explanation of the code:
- public class HelloWorld: This declares a class named HelloWorld. In Java, all code resides within classes.
- public static void main(String[] args): This is the main method where your program execution begins.
- System.out.println(“Hello, World!”);: This line prints the text “Hello, World!” to the console.
- Explanation of the code:
Step 5: Run Your First Java Program
Now, let’s run the code you just wrote.
- Right-Click in the Editor:
- Right-click anywhere within the HelloWorld.java file in the editor.
- Select “Run ‘HelloWorld.main()'”:
- A context menu will appear. Select the option that says “Run ‘HelloWorld.main()'”.
- View the Output:
- IntelliJ IDEA will compile and run your program. The output will be displayed in the “Run” window at the bottom of the IDE.
- You should see the text “Hello, World!” printed in the console.
Congratulations! You have successfully set up your Java development environment and run your first Java program using IntelliJ IDEA.
Next Steps:
- Start exploring the IntelliJ IDEA interface. Get familiar with the different windows and menus.
- Continue learning the basics of Java programming, such as variables, data types, operators, and control flow.
- Try writing and running more simple Java programs in IntelliJ IDEA.
You’re on your way to becoming a Java developer! Good luck with your learning journey!
